Your Odyssey voyage checklist
Last updated: October 7, 2024

Odyssey, Omeda’s marketing automation solution, allows you to build automated marketing voyages across multiple channels, including email, website personalizations (on-site pop ups), Facebook and Instagram advertising, Google Ads, content meters (content gates) and more. Some common use cases include:
- Welcome series
- Re-engagement campaigns
- Subscription renewal and payment failure emails
- Lead generation for advertisers
- Upsells or cross-promotions: Automatically deploy additional campaigns when audience members fall into the right combo of products, demographics, and behaviors
Whether you’re sending a single email or running a multi-channel campaign, there’s a lot you can do with Odyssey. But with a lot of features come a lot of moving parts to manage. So before clicking “Schedule” on your Odyssey voyage, you need to make sure everything is set up as intended.
Reviewing these details in Odyssey is easy: Just click on each element, then review any relevant settings on the right-hand panel that appears.
Check out the Email Engagement Report for the latest benchmarks & best practices
Use this list to double check the most important elements of your voyage — and run your campaigns with peace of mind:
Audience element
- Should the audience be set to Continuous (new audience members can enter the voyage) or Static List (no new audience members can enter)?
- Is the correct audience query or file selected for your Audience Source?
- Refresh the query count to make sure the number looks right (if your list is normally around 10,000, but it’s suddenly showing 1,000, trouble shoot before sending).
- Is there a suppression query or file you need to add? Suppressions can also be built into queries and likely won’t be relevant when using a static list.
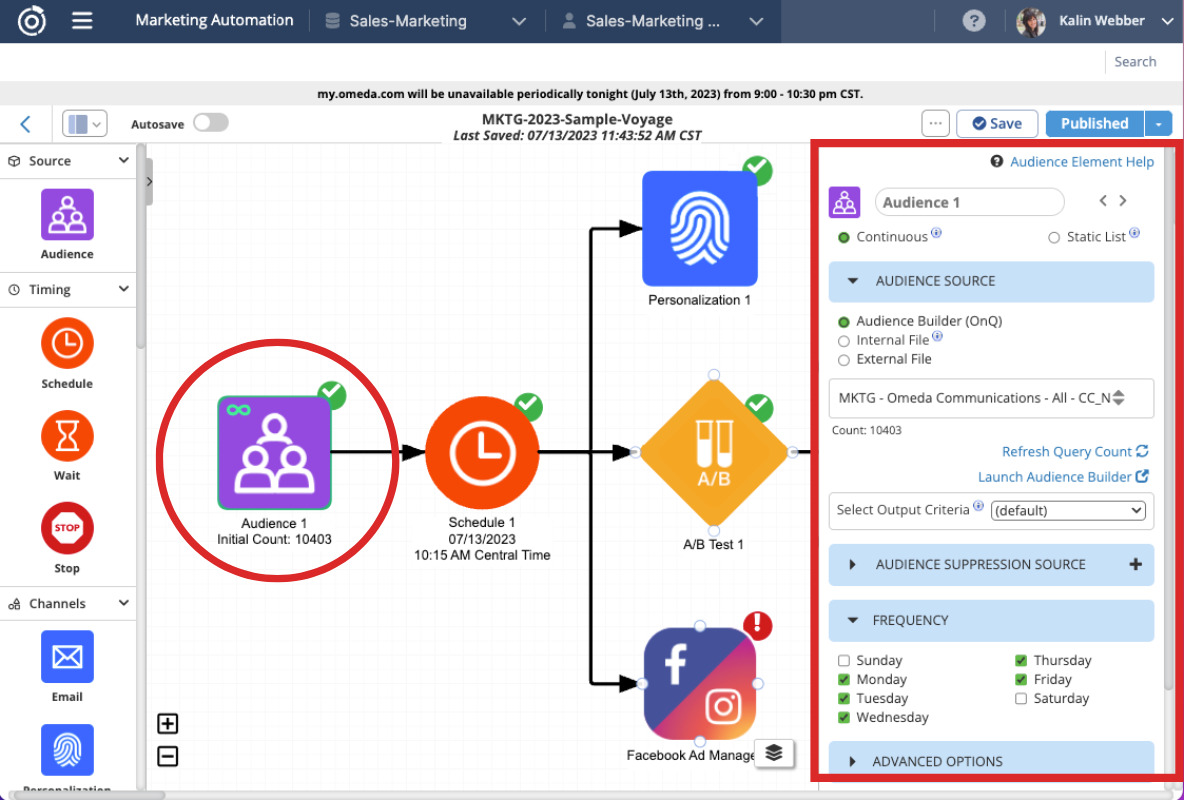
More about Audience element settings here.
Timing elements
- ALWAYS double-check the start date and time for your voyage in the Schedule element. If setting an end date and time, then decide whether your voyage will stop gracefully (so all audience members finish the voyage) or immediately (so no marketing from the voyage will go out to any audience members after a specific date and time).
- Check your Wait elements to make sure you’ve allotted the right amount of time between sends. You can set a specific duration between each send (3 days, 5 days, etc.), or choose to send on specific dates.
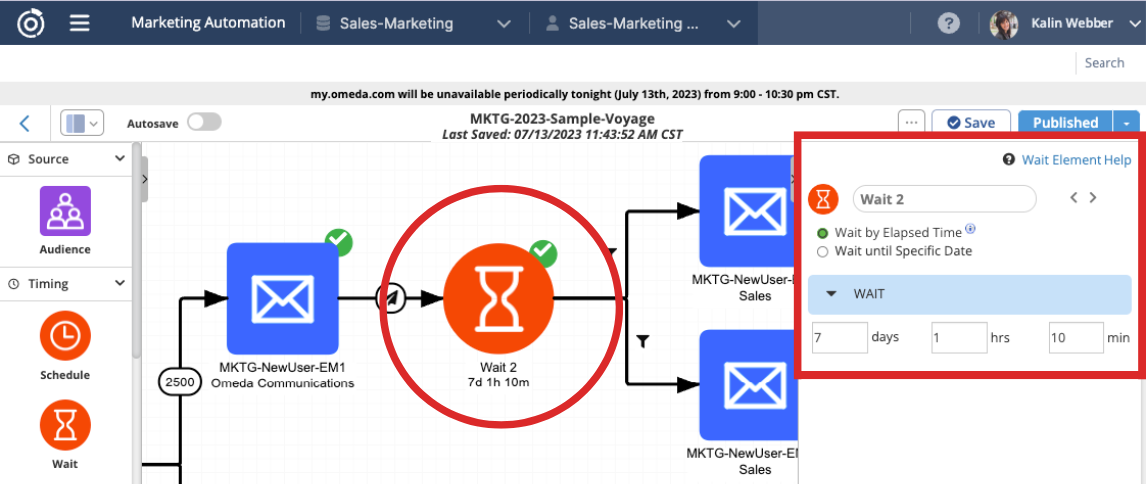
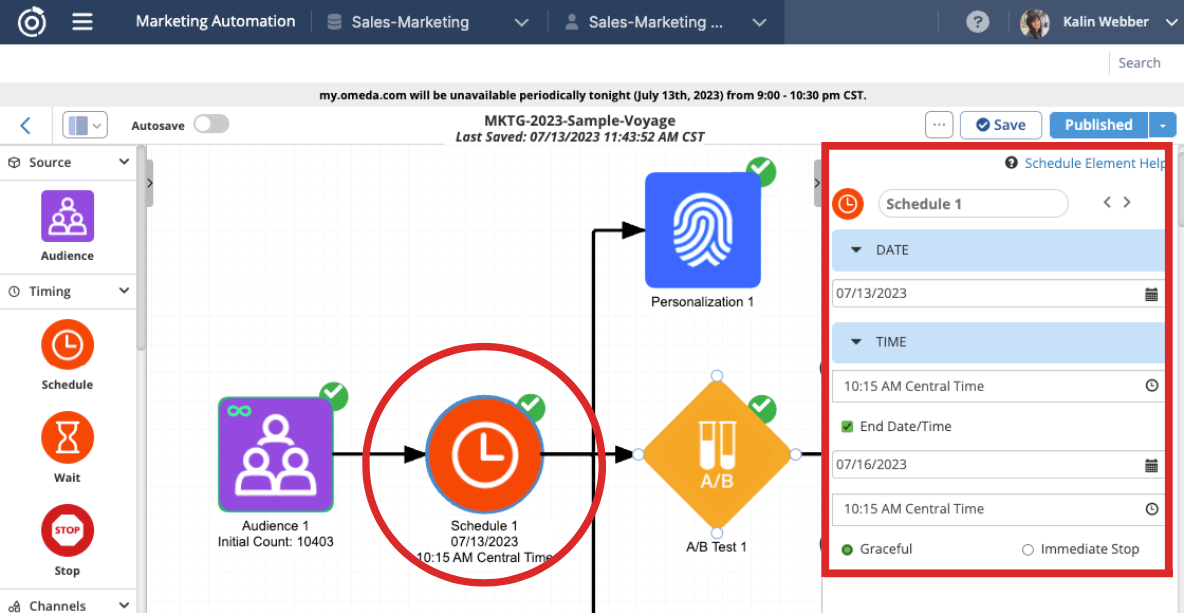
More about the timing element settings here.
Email element
- Proof your Message Details! Make sure you’ve selected the correct Deployment Type. Besides complicating your reporting, choosing the wrong type could create issues when your audience tries to opt out or adjust their email preferences.
- Include a relevant and clear subject line. (Not sure how long your subject lines should be? Spark some ideas with our research on subject line length.)
- Send at least one test email to a desktop and mobile device to ensure that your message is optimized across devices. Also test your email in both light and dark mode, as more and more people are beginning to use dark mode exclusively. From there, proof your email content, design and your sending details (from name, reply-to address, preheader, etc.).
- If you are using more advanced features, like Dynamic Content, check all your settings before scheduling.
- Make sure you’ve added any necessary seeds to your voyage. So for example, if you’re setting up an ABM campaign for prospects, make sure your sales team receives a copy by adding them as a seed.
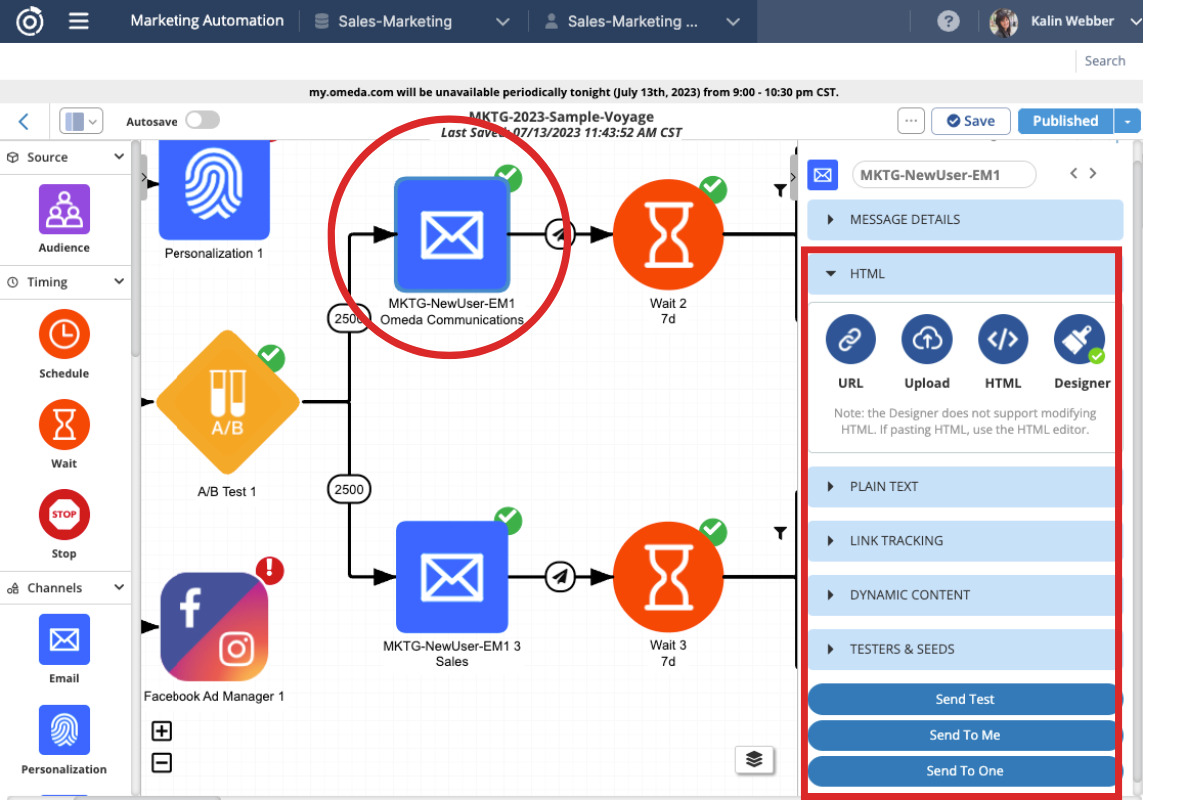
More about Email Element settings here.
Personalization element
- If you’re using personalizations (on-site pop-ups) in your campaign, always double-check the settings (priority, frequency, timing, etc.). If one of these settings is incorrect, your personalization might not fire — or it may not reach the intended audience.
- Test your personalization on one of your target webpages to confirm that everything looks good and is working as intended. Be sure to proof on both desktop and mobile.
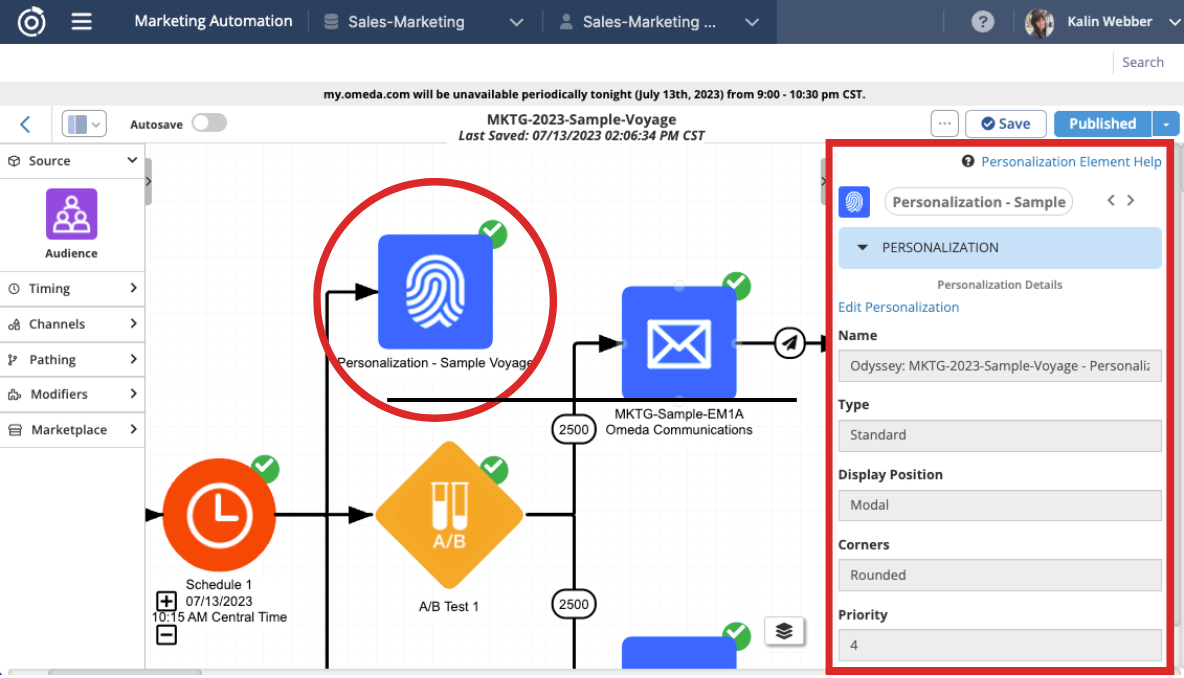
More about the Personalization element here.
Connections
Don’t forget to check the connections between your elements (the black lines between your elements)! If they aren’t configured correctly, your audience may not receive the right messages or your campaign could be interrupted. Double check the following:
- Triggered Conditions: If you want your audience to advance down a certain path depending on which links they click in an email, double-check the link settings and timing before scheduling your voyage.
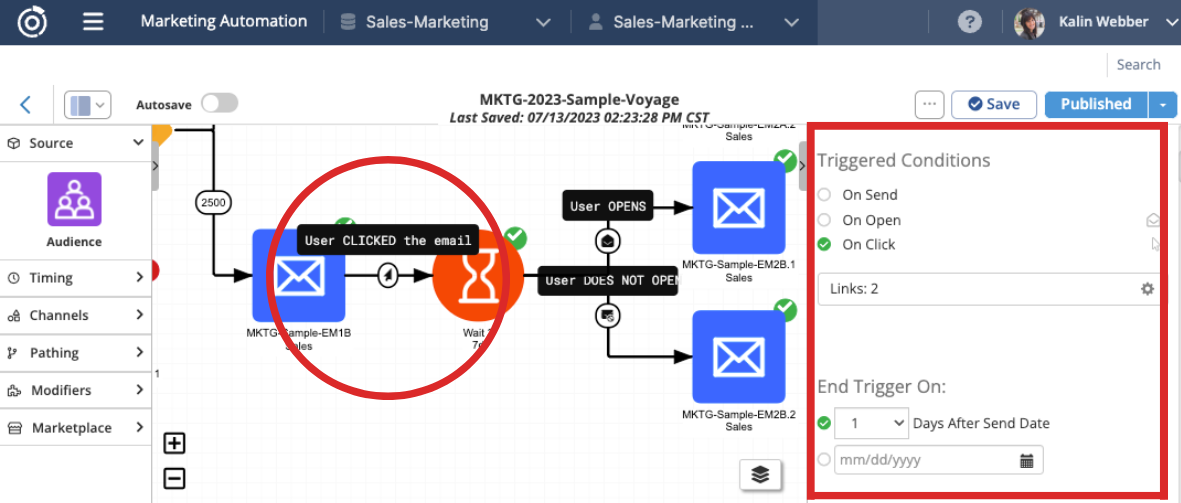
- Delayed Conditions: Want your audience to receive different emails based on how they interact with previous messages? Double-check the Delayed Conditions filters to specify which emails should be received based on whether the person opens and clicks a link, or they don’t open the email.
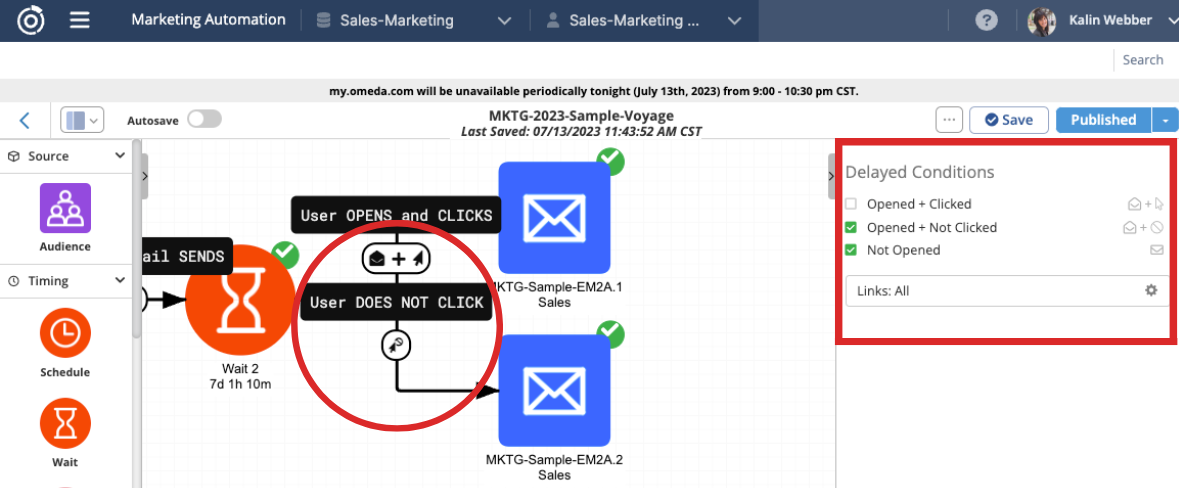
More about Connections here.
A few odds and ends:
- Don’t forget to clearly label your voyage and all your elements. You’ll thank yourself later when pulling a report!
- Need inspiration for your next campaign? Discover new use cases — and find new ways to perfect your voyages — here (a few things we have in mind: run A/B tests on emails or add a Goal Element to filter out recipients that have already met the conditions of your voyage).
Subscribe to our newsletter
Sign up to get our latest articles sent directly to your inbox.