How To Use Progressive Profiling
Last updated: May 20, 2024

Optimize Your Webforms and Increase Conversions using Progressive Profiling
For many media companies, finding the balance between acquiring your website users’ data and converting the users into tangible subscribers, leads or customers is a difficult one to strike. Using Omeda’s webform product, Dragon, has made it easy to prepopulate the data we store onto your forms and conditionally display relevant questions based on their provided location or demographic information which has eliminated much of the clutter that might otherwise deter conversion.
Many Omeda clients have taken advantage of these tools, but some may not be aware that Omeda also offers a progressive profiling tool that lets you display only the demographic questions that your user has not yet answered. Each time your user visits one of your forms, you can ask a new question or set of questions, thus eliminating the number of irrelevant questions your user is required to answer with each visit to your form(s).
Streamline your tech stack: Boost efficiency, unify data & retain talent! Get expert tips now
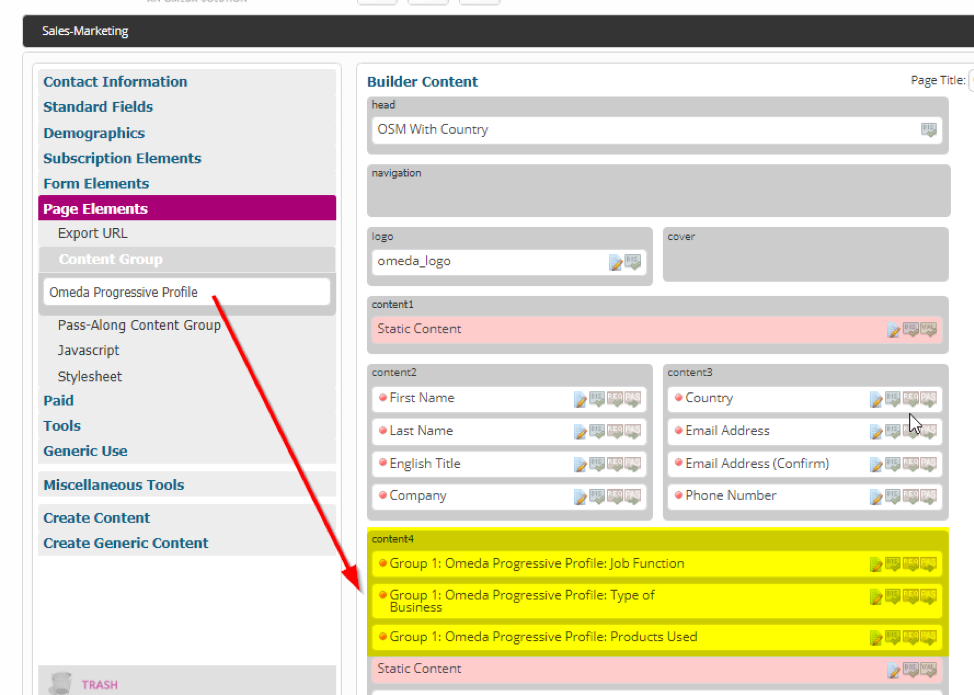
You can set up progressive profiling on your Dragon form by selecting Form Builder (Dragon) from the blue menu bar at the top of the Omeda portal. You’ll first want to create your content group, or the set of demographic questions you want included in each profile. You can create this in Dragon Content in the Additional Elements section.

Here you will need to create a Short Description of your profile and specify a limit for your results. This means that on each form with your progressive profile content group, you can limit the number of questions that display. So, if your content group has three questions and your limit is one, you will only show one of your user’s unanswered questions anytime they visit a form. If the user has answered all of your questions, no questions will be displayed.
Next, you can click “Add Content” and select each demographic question you’d like included in your content group. When you have selected all your questions. Click “Save” in the menu at the top right-hand side of your screen.
Once saved, your content will be available to drag onto any of your forms that have lookup functionality, like your renewal or preference forms.

You can edit how you’d like each demographic to display on the form either in the builder or in Dragon Content for each item and, when you’re happy with how it looks, publish the form.
With this tool, you can truly optimize your audience’s experience while collecting the demographic information you need. For help setting this up on your own forms or any further questions, please contact clientsuccess@omeda.com.
———————————-
Photo by Dan Freeman on Unsplash
Subscribe to our newsletter
Sign up to get our latest articles sent directly to your inbox.